
This is a step-by-step guidance to migrate a PVCS archive/project into a TFS server.
1. Select the computer you want to use
Depending on your PVCS version (before version 8.3.*), you have to use Windows XP which means that you have to use VS 2010. If your PVCS version is supported on Windows 7, you also can use VS 2012. You can also use VS 2010 if you want to access TFS server 2012, 2013 or visualstudio online (www.visualstudio.com)! You only need to have the GDR update installed.
In the following scenario, we use Windows XP, PVCS 7.5.* and Visual Studio 2010 connected to Visual Studio Online.
2. Unpack the PVCS2TFS migration tool
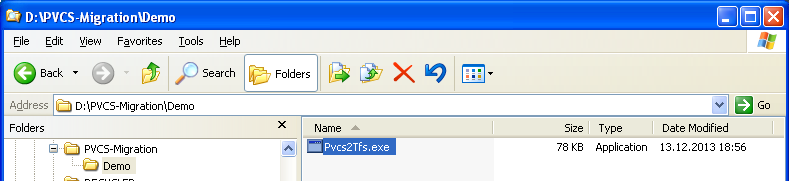
The migration tool is only one file and there is no need to install anything (everything is installed with PVCS or VS setup). Just copy it to any folder you want. In our guide we copy it to D:\PVCS-Migration\Demo
If you want to use VS2012 to do the import, the migration tool is called “PVCS2TFS2012.EXE”.
3. Start the PVCS2TFS migration tool
Start the PVCS2TFS tool by double clicking the file in explorer. The following windows will appear:
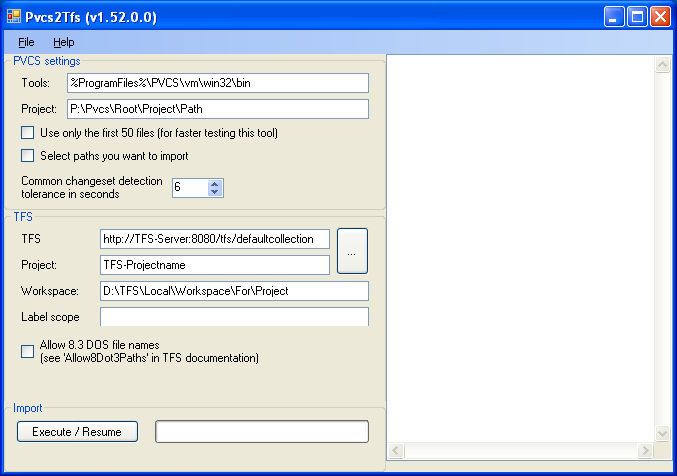
For an explanation of the different elements on the dialog, please take a look at our documentation.
4. Locate the settings for the PVCS project
Now we need to enter the PVCS project path. You can find it in your PVCS version manager:

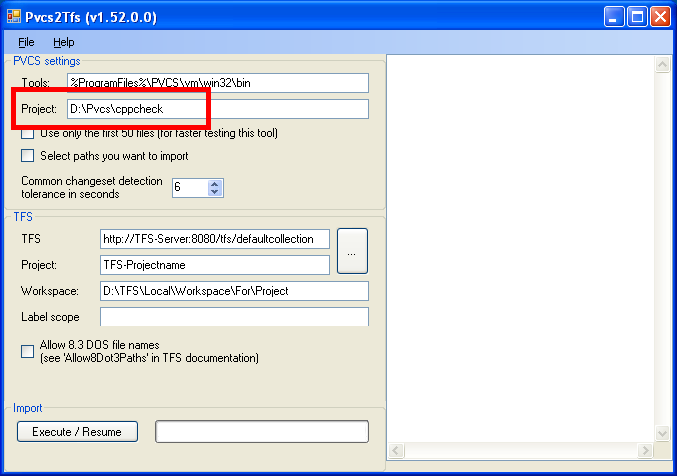
In our case, this is D:\Pvcs\cppcheck
Enter the PVCS project path
Now we have found our PVCS project path, we have to enter this in the PVCS2TFS migration tool:
Verify the PVCS location
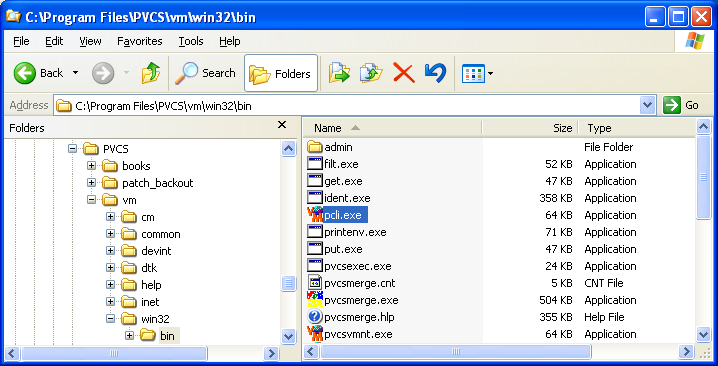
Now we need to be sure that we have set the correct path to the PVCS tools. For our scenario this is %ProgramFiles%\PVCS\vm\win32\bin. We can verify this by copying this into explorer verifying that the file “pcli.exe” exists in the given directory:
With other PVCS version, there might be other paths, for example %ProgramFiles%\Serena\vm\win32\bin. Please be sure you have selected the right path. You can either enter the full path or use the path with environment variables (like here).
Now we have finished the PVCS part of the migration settings.
5. Locate the settings for TFS
Now start Visual Studio and connect to your TFS you want to use.
For more informations see Connect to and Access Team Projects in Team Foundation Server
Workspace mapping
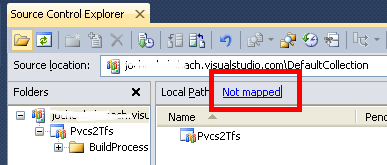
If you have not yet created a workspace mapping, you need to press the “Not mapped” link in the Source Control Explorer:
For more information see Create and Work With Workspaces
Special consideration for VS 2012 and later
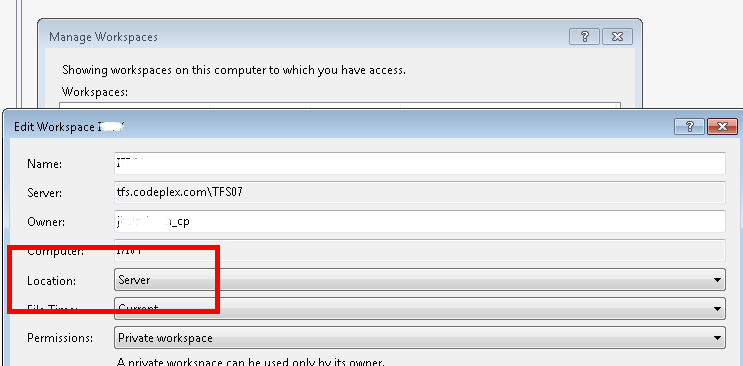
If you are using VS2012 (or later), you need to be sure that your workspace is using a “server” based workspace. Go to “Source Code Explorer” and open the “Workspace” drop down list on the top and select “Workspaces…” and then select your workspace and press “Edit…” and press the “Advanced >>” button to display the advanced features. Change “Location” from “Local” to “Server”.
Get the latest Version
If you want to import into a special directory, you must be sure, that you have retrived the latest Version from your TFS server. Therefor open “Source Code Explorer” and select the directory (or root-directory of these) where you want to import the archives. Then you need to right click on it and select “Advanced…|Get specific version…”. Then be sure you check the following two options:
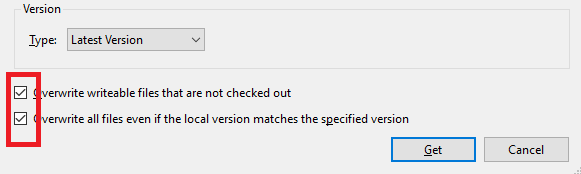
Then you must press “Get”.
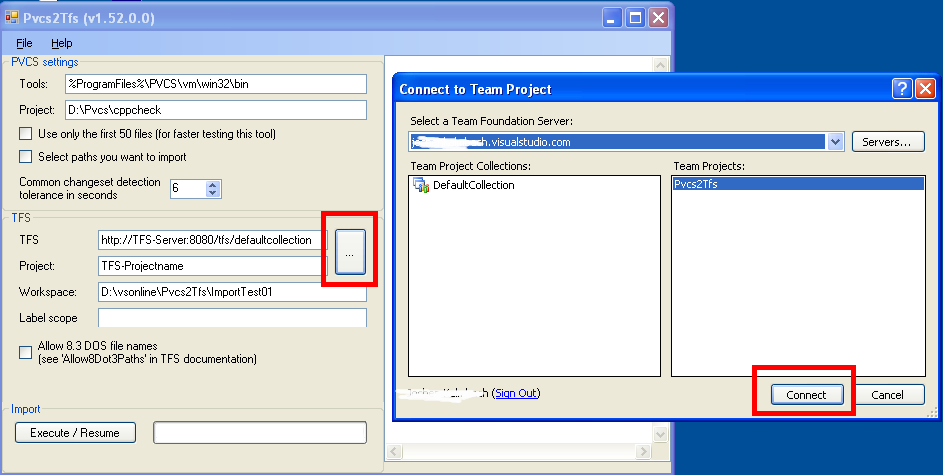
After this, you need to select the TFS server and copy the path to the PVCS2TFS migration tool:
First we select the TFS-Server:
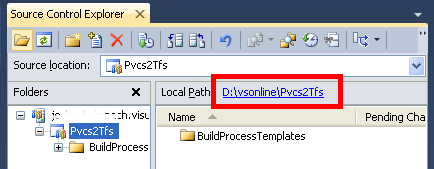
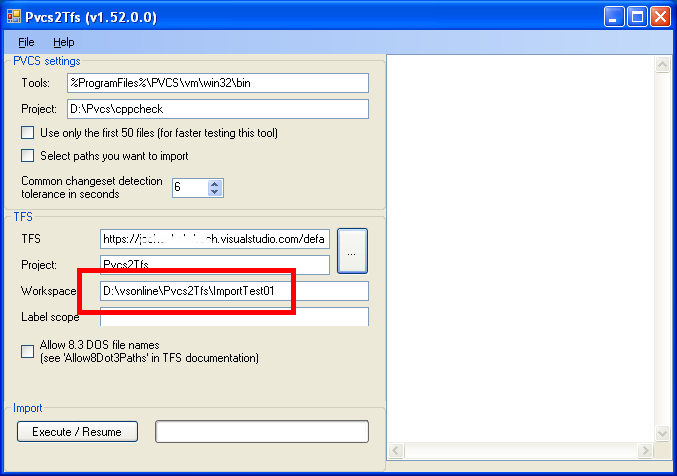
Then we enter the workspace path. In out case, we want to import the PVCS project into the (not existing) subdirectory “ImportTest01”. This sub directory will be automatically created during the import process. So we enter D:\vsonline\Pvcs2Tfs\ImportTest01 into the “Workspace” field:
6. Save the migration project in PVCS2TFS
Now we can save these settings, if we have to use this (or similar) settings later: File | Save as…
6.1. Special considerations for large PVCS Projects
If you have really large Projects (about > 10.000 – 50.000 files), you should consider to do the Migration in different steps.
The recommended way is to migrate each main-directory of the project by itself (or a group of main-directories). Therefor you must check the “Select paths you want to Import”. Then, after the tool got the file list, you can select which main-directory you want to migrate.
If you have to resume the Migration, you must be sure to select the same paths as you have for this first time.
7. Start migration
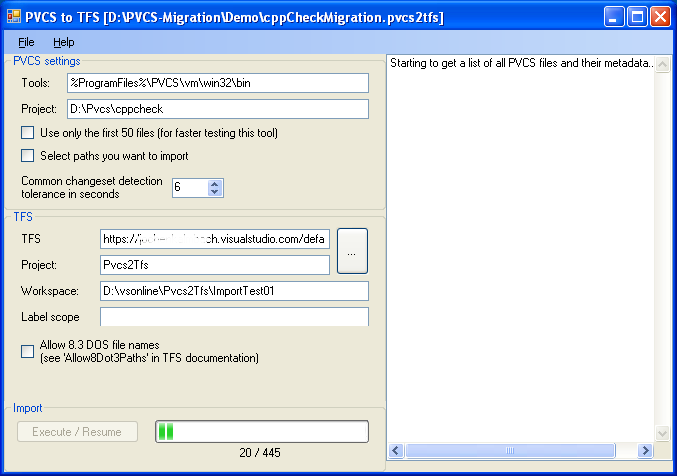
After we have set up the migration project, we can start the migration by pressing Execute / Resume.
Be aware: After you have started the import, all data will be stored in the “Data” subdirectory of the PVCS2TFS directory. If you start the import again, only a resume is done! If you want to import a new project or start from scratch, you need to delete the “Data” subdirectory!
The import first gets a list of all PVCS files and then retrives the meta data for each file:
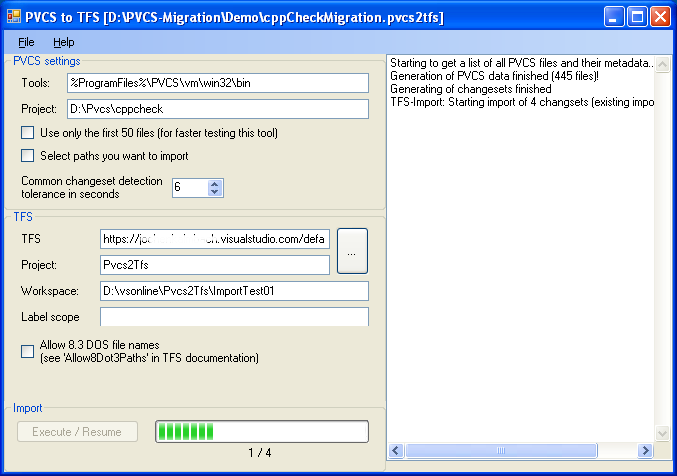
After that, the changesets are generated and then the import of the files start. Be aware, that the number of changeset might differ from the number of files. In our case, we have 445 files but only 4 changsets.
After all changesets get checked in, the lables are assigned to the files/folders:

It is recommended, that you save the “Data” subfolder of your migration for later use, if you have any issues with the migrated data!
8. Verify migration
You can now look into your Source Control Explorer, and should see all files:
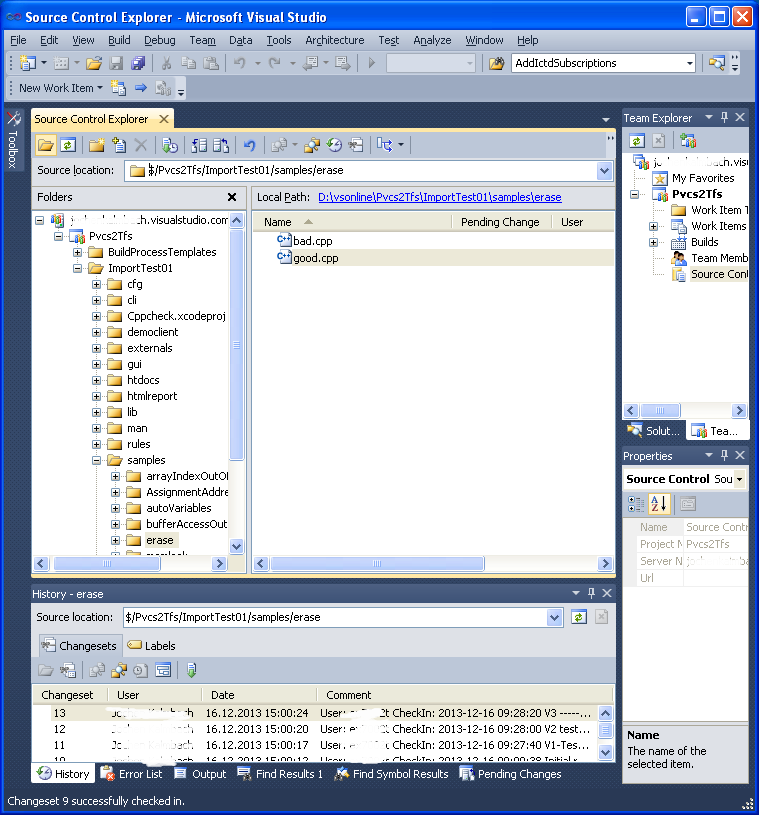
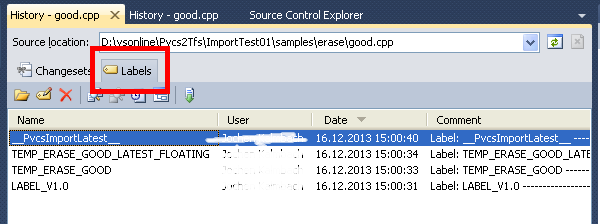
Labels
Also if you select a file or directory, then you can view all labels by right clicking “View history” and then selecting “Labels” in the above tab:
Latest revisions
Remarks: This step is not needed if you had checked the “Create top changeset for ‘latest revision'”! Then the latest changeset is automatically the top PVCS revision.
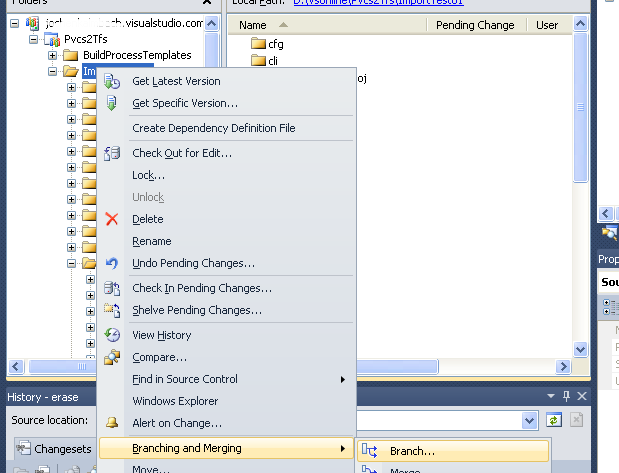
If you had branched files in the PVCS history, it is recommended to create a “trunk” branch in TFS based on the label “__PvcsImportLatest__”. This can be done by right click on “ImportTest01” and then select “Branching and Merging | Branch…”:
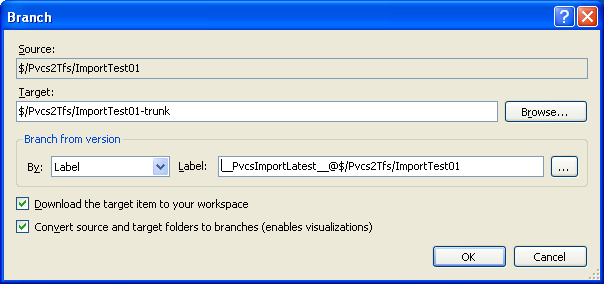
And then select the label “__PvcsImportLatest__” (via “Label: …”). You can specify the name of the target directory. In our case we used “ImportTest01-trunk”:
After the branch was created, you need to checkin this branch-creating (depending on your TFS version).
It is then recommended to do at least a comparsion of the folders from the “__PvcsImportLatest___” with a folder with the latest PVCS revisions.
